

Recently, VPN services have become more popular and several people are looking for good VPN providers. Using a good VPN service has several benefits. People mainly use it to access geo-restricted content and improve their privacy. It is also good to use a Virtual Private Network (VPN) when you are using public Wi-Fi.
Among a large number of VPN users, only a small fraction of people use paid VPN services. Why? There is no single answer for that. In fact, there are plenty of free VPN services out there. Why should we use a paid service when we have numerous free VPS providers?
Remember, there is nothing FREE in this world. If you are not paying for a product, you are not the customer; YOU ARE THE PRODUCT. Most free VPN apps and services will track your online activities and sell them to make a profit. Therefore, I recommend you to always use a paid VPN.
Why Should You Host Your Own VPN Server?
But, a paid VPN service might not be affordable for you. Most of the services cost $10 per month (when paid monthly). If you want a dedicated IP, it will cost a few dollars extra.
Another problem that you might face when using a VPN with shared IP is that some websites will mark your account as suspicious or even temporarily prevent you from signing in because you are using different shared IPs from different countries for each login.
If you are facing any of these issues, it would be better to self-host a VPN server.
How To Create A VPN Server?
To create or self-host a VPN, we choose a reliable VPS service. In this tutorial, we'll be using Vultr to create a VPS. I've been using their service for the past few years to host my websites and I have never faced any issues.
Step 1: Create an account on Vultr and log in to your account.
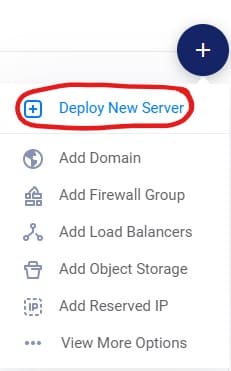
Step 2: Click on the + icon in the dashboard to create a new VPS Instance.
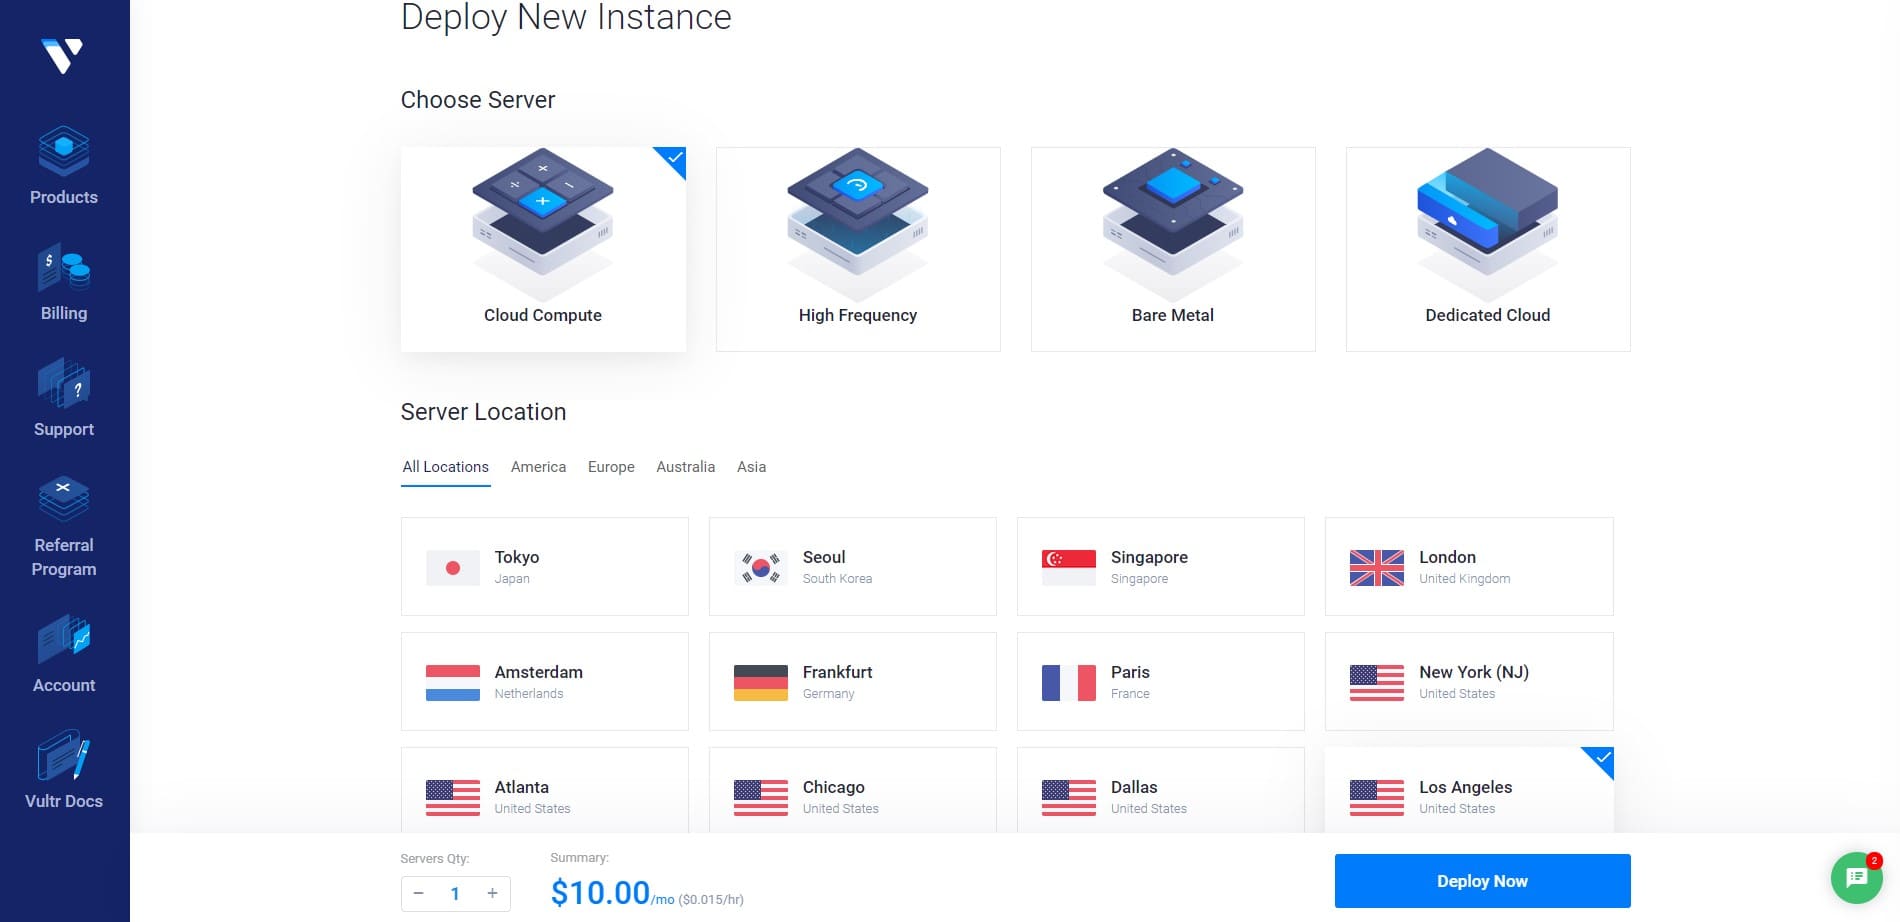
On this page, you can customize the VPS instance by choosing a preferred location, OS, memory, storage, and vCPU. To host our VPN, we do not require a powerful server.
Step 3: Choose the location where you want to host the VPS. It is better to pick a location nearest to you to reduce latency.
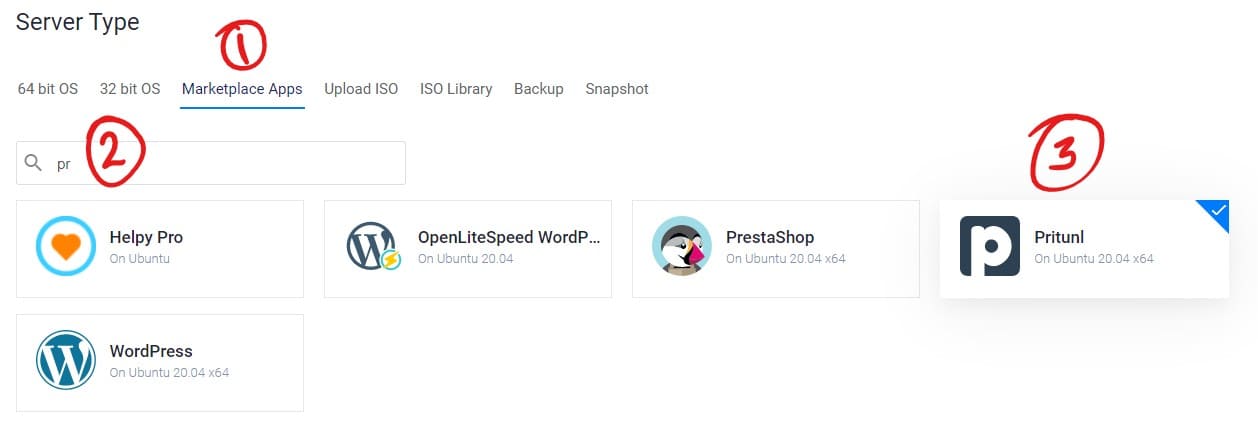
Step 4: In the Server Type section, select Marketplace Apps and search Pritunl. Pritunl is an open-source software to create and manage VPN servers.
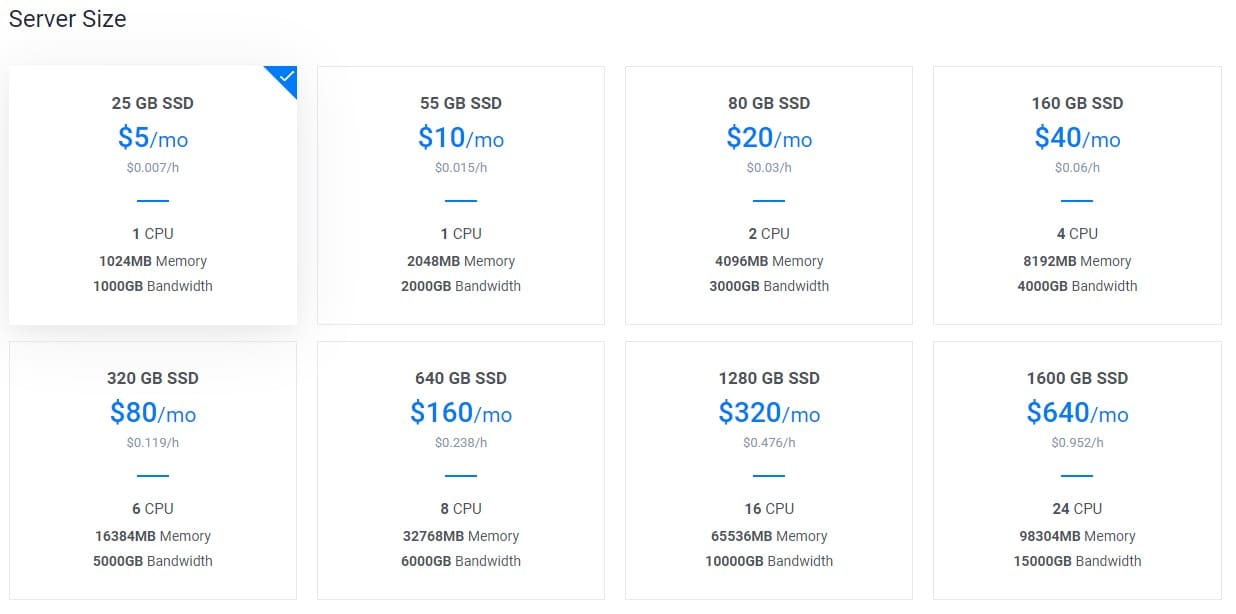
Step 5: Fron the server size section, select the $5 per month plan.
Vultr also offers a $3.5 per month plan VPS with 0.5 Gigs of RAM. But you have to manually install Pritunl.
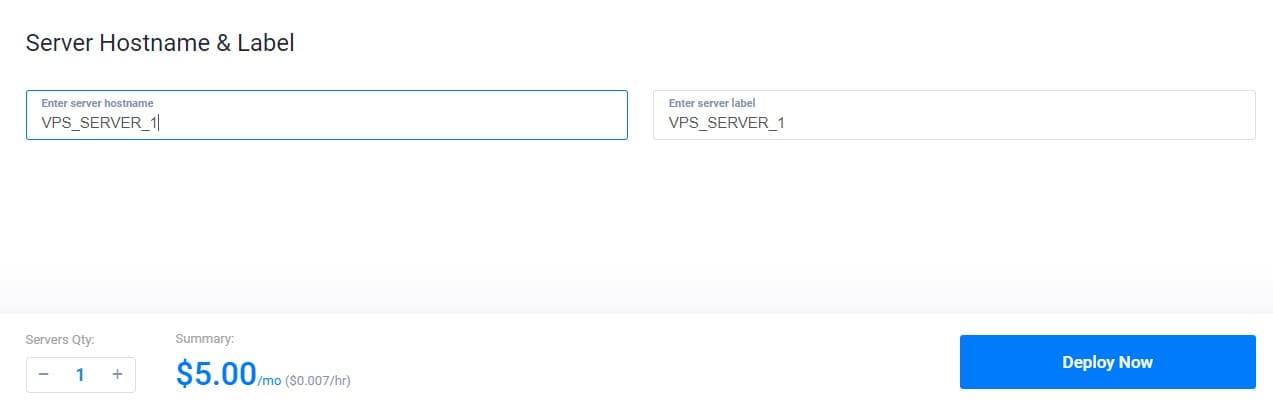
Step 6: Choose a server hostname and label.
Step 7: Click the Deploy Now button. Vultr will now spin up the instance for you.
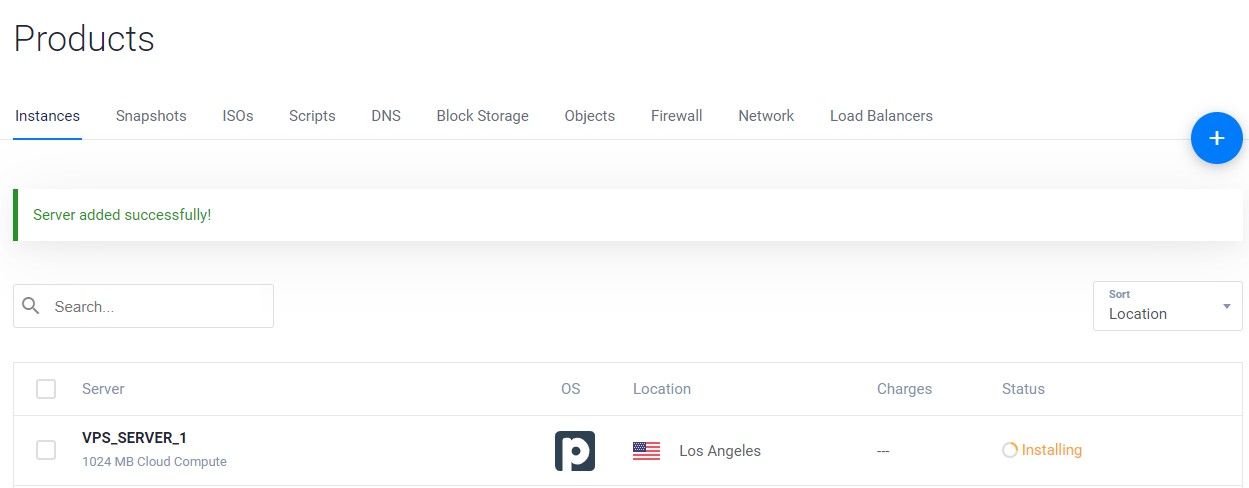
After deploying the server, you will be taken to the services list page where you can see a list of services that you are using. The status of the newly created server will be updated as Running after a while.
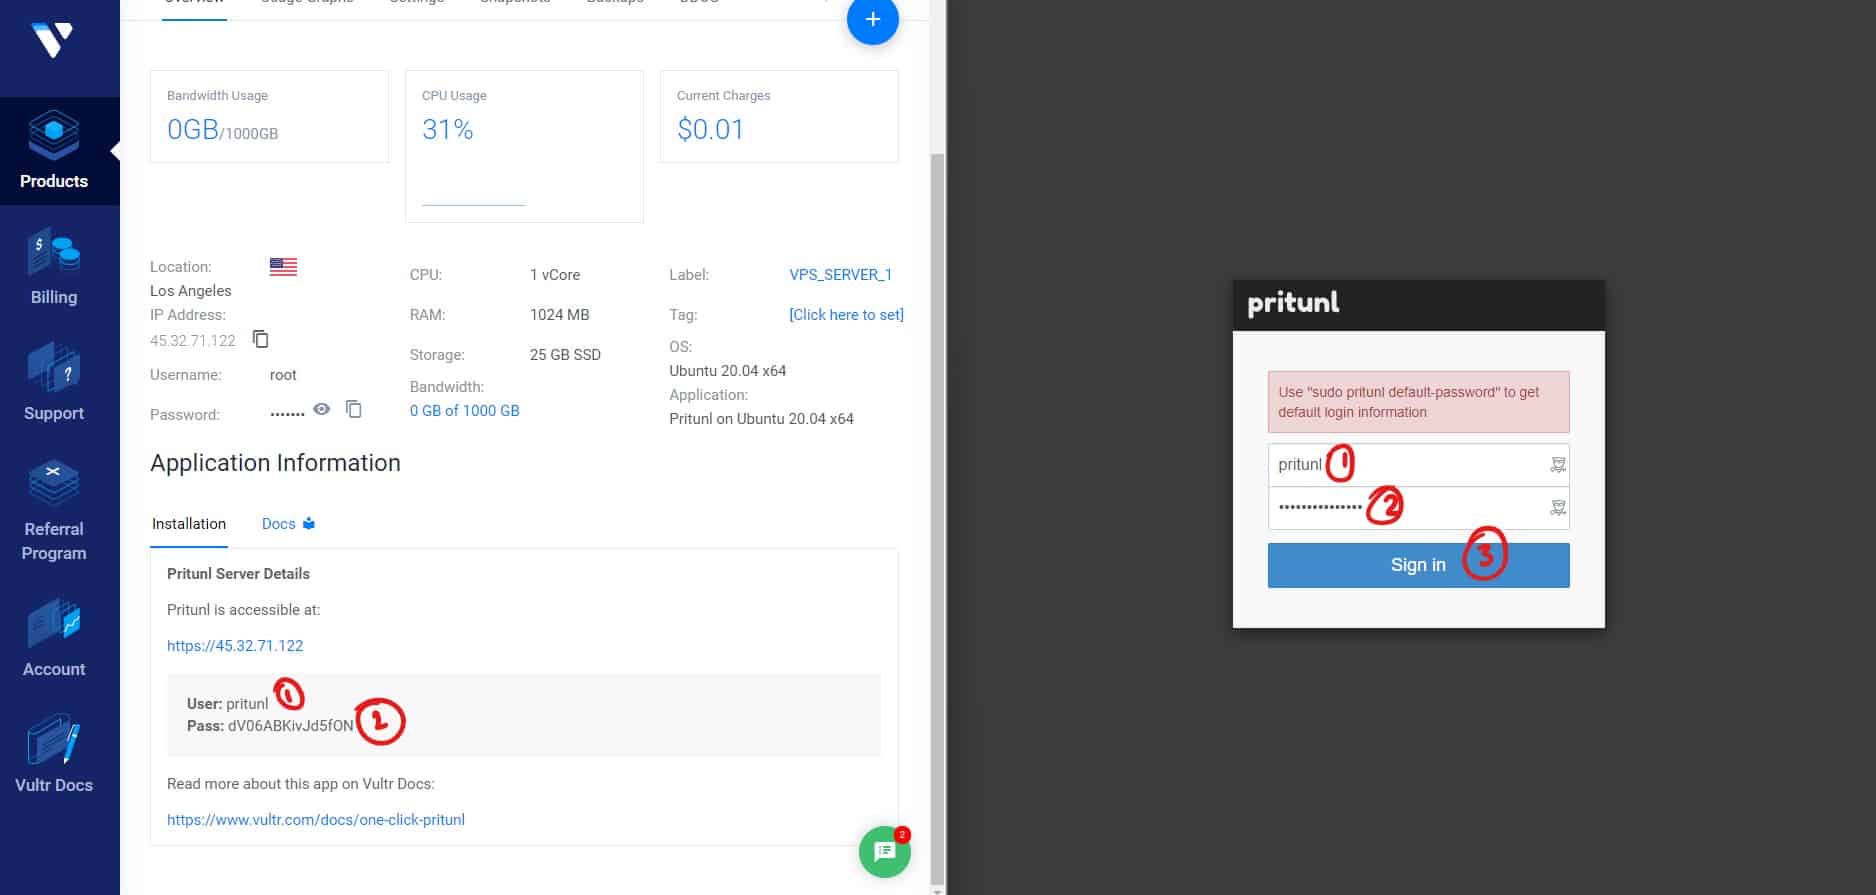
Step 8: Once the server starts to run, click on the server name to see additional details of the server.
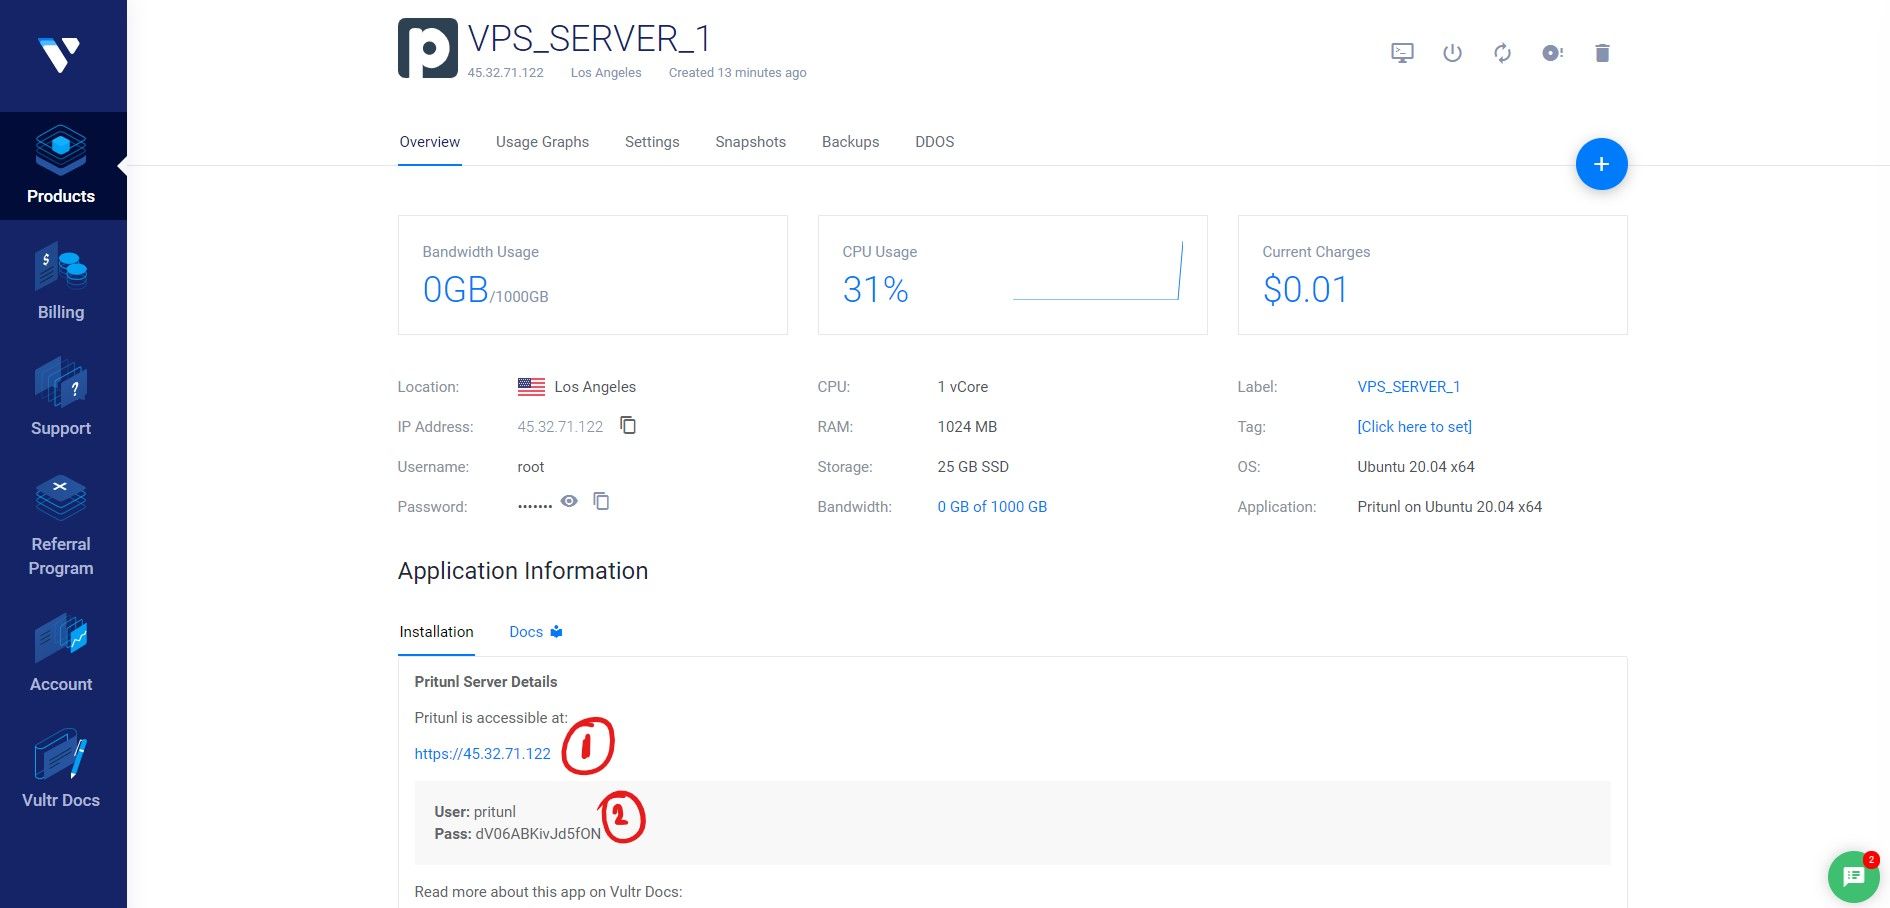
As you can see in the above image, we have the login URL (Marked as 1) and the login credentials (Marked as 2) to access the Pritunl dashboard. Copy the details and open the URL (https://your_server_ip) in a new tab.
Step 9: The browser will display an SSL error. Click on Advanced option and then click Continue to visit the website.
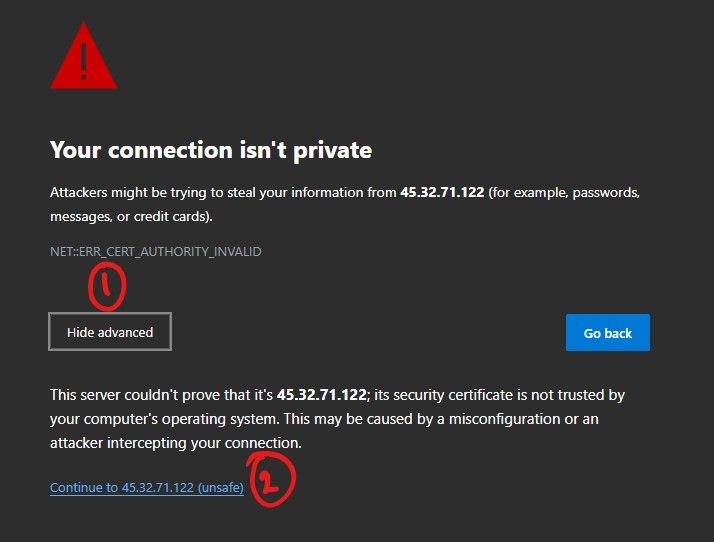
This error occurs because we have not set a proper SSL certificate at this point. We'll fix this issue soon.
Step 10: Log in to the Pritunl dashboard with the login details that we obtained before.
You will see a small popup window to change the username and password of the Pritunl dashboard.
Step 11: You can either update the information shown here or skip this step by clicking the Setup Later button.
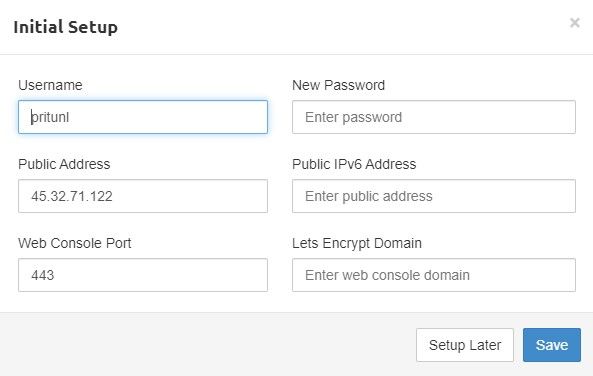
You can also set up a LetsEncrypt SSL certificate by providing a domain name if you already have one.
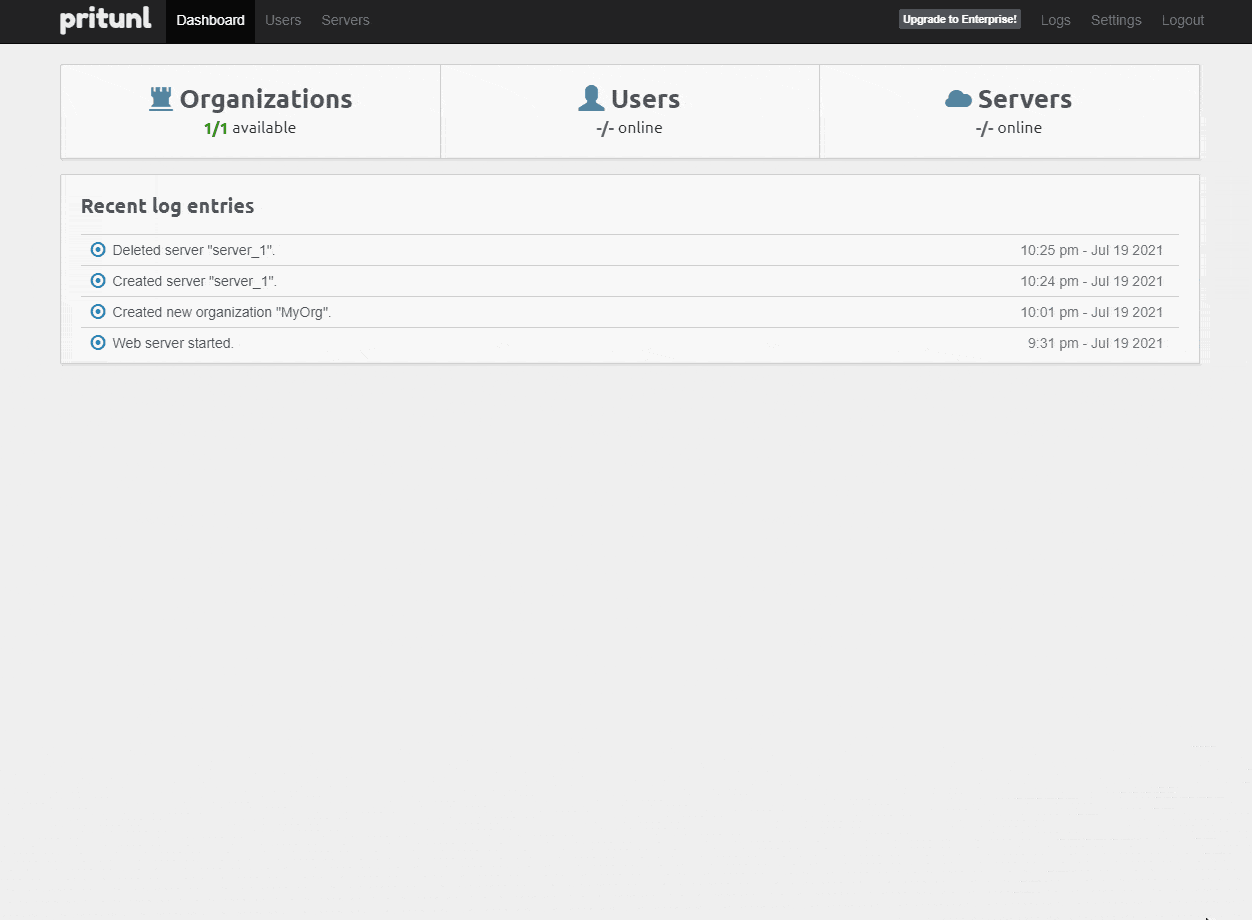
Step 12: Navigate to the Users tab and click Add Organization button to create a new organization. All users and servers should have an organization assigned.

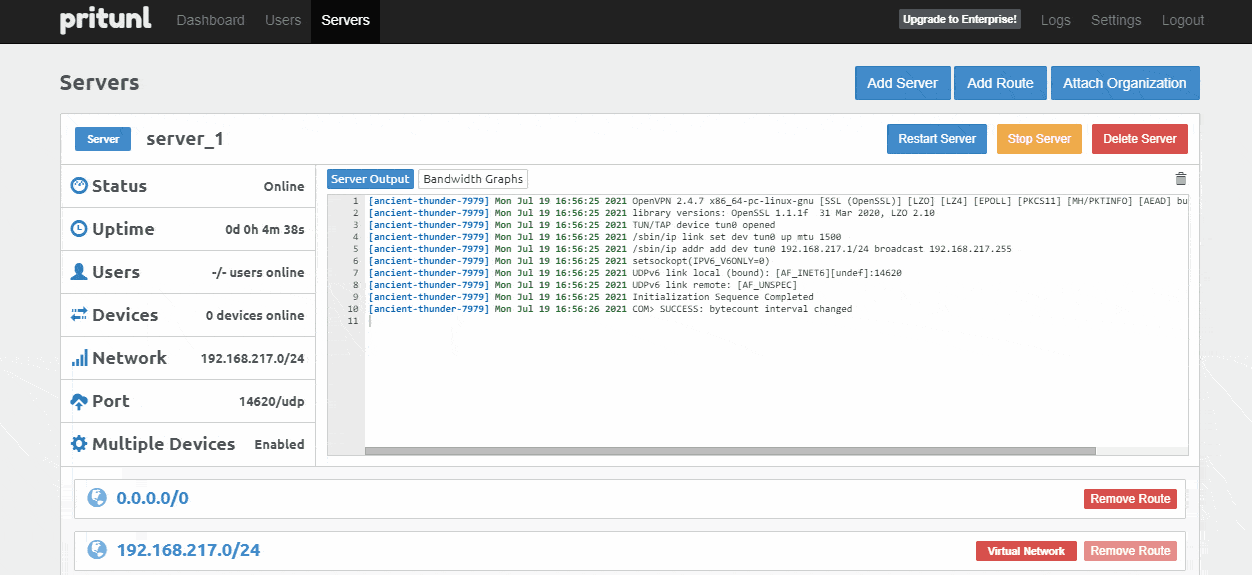
Step 13: Next, we have to create a server and assign it to an organization. For that, navigate to the Servers tab and create a new server.
You can configure the server with several parameters like the protocol, port number, DNS server, encryption algorithms, and much more.
Step 14: Create a new user and add the user to an organization. The users that we create here will be able to obtain their VPN credentials and use our VPN service.
Step 15: Click on the download button to download the connection profile and extract the file.
Download OpenVPN Connect client or Pritunl Client and open the connection profile file from the extracted folder.
You can now connect to the VPN server from any of your devices. This is you can self host a VPN server. I hope this post helped you.


