

In this post, I’ll show you how to create a custom alert box using a plugin called Sweet alert. SweetAlert is a small JavaScript plugin to create custom alerts and popup messages.
Why SweetAlert?
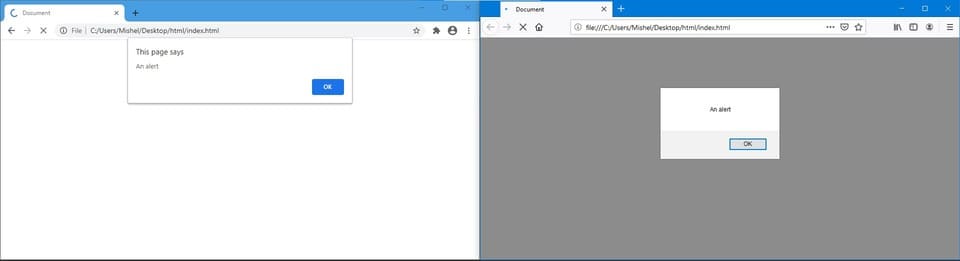
Using the JavaScript alert function is the easiest way to display a small popup message to the user. In fact, it is one of the most used JavaScript functions by web developers. But there are some problems with this using alert function. Different browsers use different styles to display an alert box. So, alerts shown on a web page will look different across different browsers.
Another drawback of the native alert box is that it is not customizable. We don’t have complete control over the look and feel of alerts.
But with SweetAlert, you can customize the design of alert box and create alerts that looks same across different browsers.
Install SweetAlert
Installation of SweetAlert is pretty straightforward. All you need to do is, just add a single line of HTML markup to your code.
<script src="https://unpkg.com/sweetalert/dist/sweetalert.min.js"></script>If you are using NPM, run:
npm i sweetalertA simple alert
SweetAlert can be displayed by calling the swal() function. You can pass your message as the first parameter to the function. Here’s an example:
swal("This is a simple sweet alert.");If you pass two parameters to the function, first parameter will be displayed as title and the second parameter will be displayed as the content.
swal("This is a simple sweet alert.", "Alert title");Pass options as an object
You can also pass options to AweetAlert as objects.
swal({
    title: "Alert title",
    text: "Alert content"
});
This method is useful when you want to pass several parameters to the function.
Add buttons
As you can see, the plugin adds an OK button to the alert. The button is fully customizable. You can even add new buttons to the alert message.
swal({
    title: 'Hey,',
    text: 'Do you want to delete this item?',
    buttons: ['Yes', 'No']
});Sometimes, you may need to handle button click events. In such cases, we can use an object to pass button details.
swal({
    title: 'Hey,',
    text: 'Do you want to delete this item?',
    buttons: {
        ok: { // Button
            text: 'Yes', // Text displayed
            value: 'yes', // Value returned
        },
        cancel: 'No',
    }
})
.then((value) => {
    if (value == 'yes') {
        swal('Item deleted');
    }
});Icons
You can also add icons to the popup. SweetAlert comes with 4 built-in icons that you can use:
- warning
- error
- success
- info
swal({
    title: "Alert title",
    text: "Alert content",
    icon: "info"
});You can learn more about SweetAlert from here.


