

In this post, I'll explain how to create custom tag helpers in.net core MVC web application. Tag helpers are simple classes that can be used to generate HTML code on the server-side.
Creating a Tag Helper
In this example, I'll be creating a profile image tag helper. To make our tag helper reusable, we'll be adding a few parameters to customize the generated HTML output.
1) Create a new MVC Web application
Open Visual Studio and select the Create New Project Option. Use the Web App (MVC) template to create a new .NET Core MVC Web Application.
You can give any name you like for the project. In this example, I've named the project CustomTagHelper.
2) Create a namespace
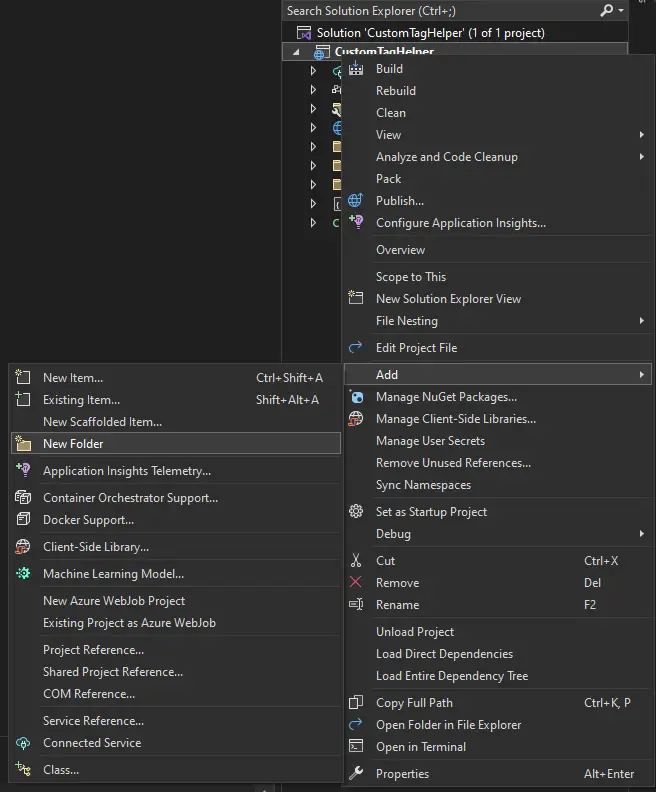
Next, create a new folder called TagHelpers. This is where we'll keep all custom tag helpers.
3) Create a tag helper class
Add a new class called ProfileImageTagHelper in the tag helpers folder.
4) Override the process method
Inherit our custom tag helper class with TagHelper class. To use the TagHelper class, we have to import Microsoft.AspNetCore.Razor.TagHelpers namespace.
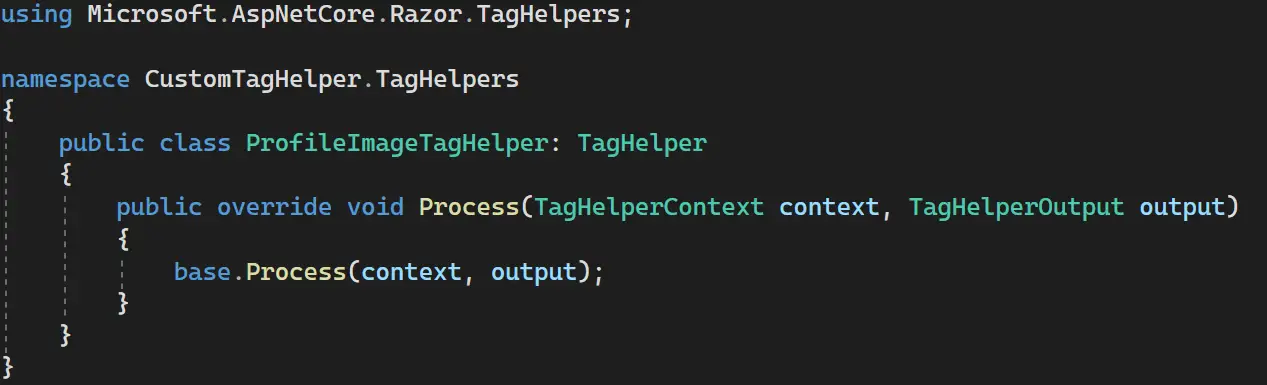
Override the Process method to implement our custom render logic.
5) Customize the tag helper
Make changes to the ProfileImageTagHelper class as shown in the following image.
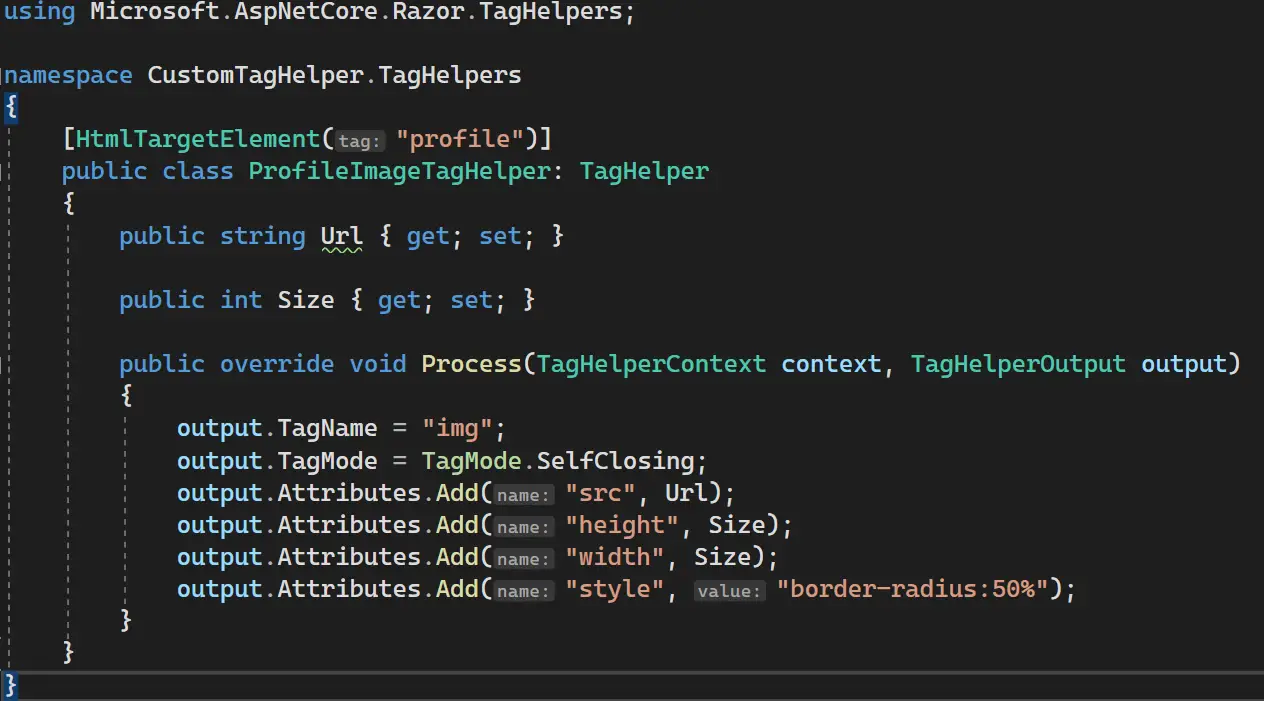
- In the HtmlTargetElement attribute, we can specify the HTML tag that should be used to call our custom tag helper.
- TagName property is used to specify the tag of the rendered HTML. In our example, this tag helper generates an <img/> tag.
- Additional attributes can be added to the rendered tag using the Attributes.Add() method.
- We can add properties to accept additional data.
6) Register the tag helper
The last step is to register our custom tag helper. To register our tag helper, add the following line to _ViewImports.cshtml file located in the Views folder.
@addTagHelper *, CustomTagHelper7) Test the tag helper
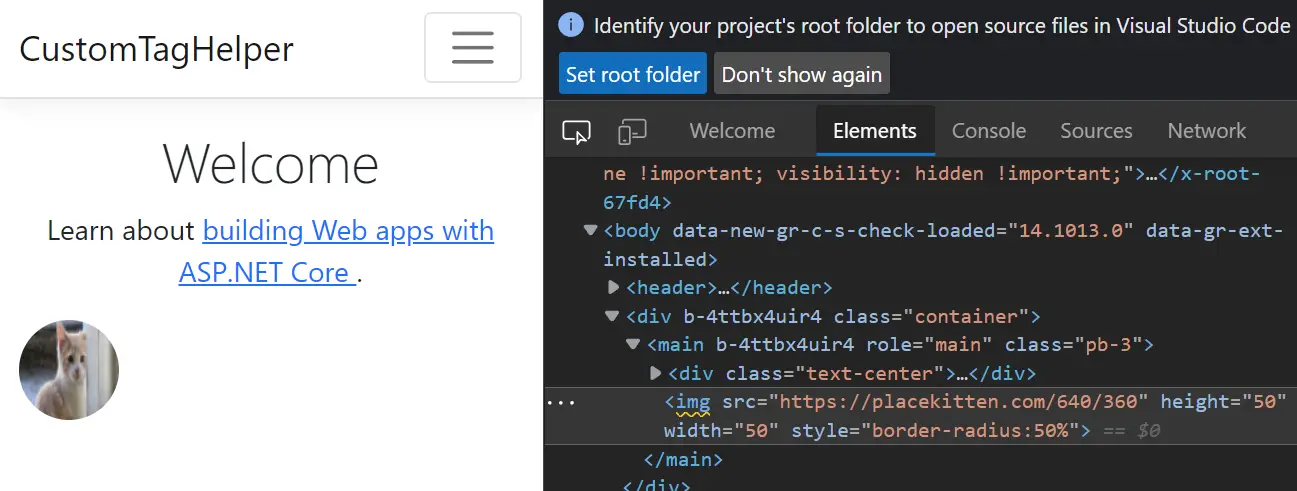
Now, we can use our custom tag helper in any view files as shown below.
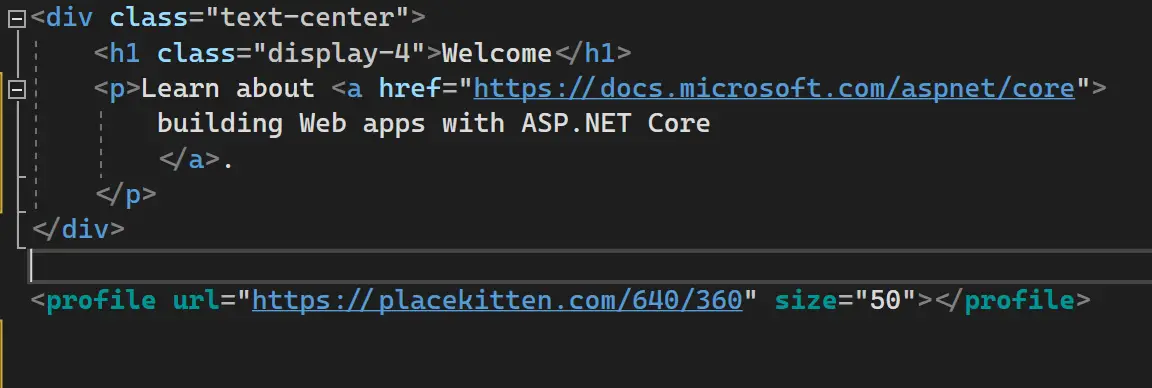
Notice that the Url and Size property acts as the attributes here.
This will render the following output and HTML markup.
Happy coding 👍.


