

This article demonstrates How to use Bluestacks as emulator in Android studio.
If you are an Android developer, you may have already used Android Virtual Device ( AVD ) or your device to run your projects. Most developers use AVD instead of using their Android device. But running AVD in computers with less than 8 GB RAM is really time-consuming. Also, AVD will be slow on some processors. In such devices, it’s a good idea to use an android emulators such as Bluestacks or Memu instead of AVD.

Bluestacks as emulator in Android studio
Time needed: 10 minutes.
- Install Bluestacks. Visit the official website of bluestacks to download the latest version of the software. In this post, I’ll be using Bluestacks 4. If you want help with installing Bluestacks, please check this link.
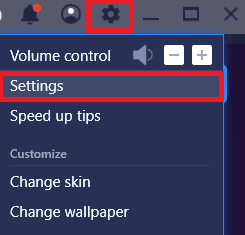
- Open settings
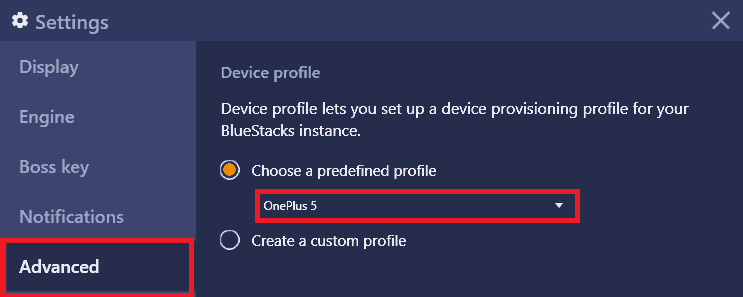
- Find the device name from the “Advanced” tab.
After starting Bluestacks, go to settings and open the Advanced tab to find the device name.
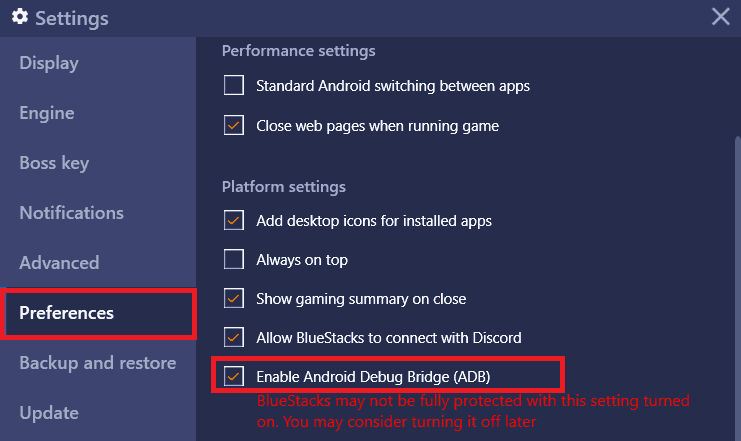
- Enable Android Debug Bridge (ADB) from Preferences tab.
To access your emulator from visual studio, You should enable ADB under Settings-> Preferences -> Enable Android Debug Bridge (ADB).
- Open Android studio and create a new project.Open android studio and create a new project or open an existing project that you want run in the emulator.
- Click on the Run Project ( ▶ ) button and choose the Bluestacks emulator.Either click on the Run Project ( ▶ ) or press Shift + F10 to run the project. From connected Devices section, choose the Bluestacks emulator and hit OK. For me, the name of Bluestacks emulator was OnePlus 5.
Well, this is how you can use Bluestacks as the emulator in Android Studio.


