

Jitsi Meet is an amazing open-source alternative to proprietary video conferencing services such as Zoom, Google meet, and Cisco Webex.
If you want to test Jitsi or you want to host a meeting for free, visit Jitsi Meet. It is a cloud-hosted version of the Jitsi Video conferencing software.
If the free cloud-hosted version is not suitable for your needs, for example, if you want more customization, you can self-host Jitsi Meet.
In this post, we all learn how we can create a private Jitsi Meet server to host meetings and video calls. Like any other video conferencing application, Jitsi needs a good server to work without any troubles.
Prerequisites
Before continuing, please make sure that you have the following requirements satisfied.
- You should have a fully qualified domain name to host a Jitsi meet server.
- A Linux server is required to host Jitsi Meet. The more powerful the server is, the more reliable your Jitsi meet instance will be. If you do not have a Linux dedicated server or a VPS, you can deploy one on Vultr in under 60 seconds.
- You should be familiar with basic Linux commands.
Disclosure: We only recommend products we use and all opinions expressed here are our own. This post may contain affiliate links that are at no additional cost to you. We may earn a small commission when you make a purchase using our links.
System Requirements
To self-host Jitsi Meet, I recommend you to choose a server with the below-mentioned specifications. These specs may not be adequate if you are planning to host a meeting with more several participants.
- A server with Ubuntu 18.04 or 20.04.
- At least 1 GB of RAM (4 GB is recommended).
- 1 vCPU (2 is recommended).
- 25 GB Storage.
You can install Jitsi on a server with 1 Gb of RAM. I was able to successfully host a meeting with 10 members on Vulter $5 VPS instance with 1GB RAM and 25GB SSD storage. For better results, choose a server with more system resources.
Update DNS Records
To host a Jitsi Meet server, you should, first, configure your DNS records to the IP address of your server.
For example, if the domain name is example.com and you want to host Jitsi on jitsi.example.com, create a new A record in the DNS with the name jitsi and set the IP address of the server as the value.
Set Hostname
You have to set up a hostname before continuing. Connect to the server and open /etc/host in any text editor.
If you are using SmarTTY on Windows, you can directly edit the file from the application window.
If you like to use nano instead, run nano /etc/host.
The content of the host file will look similar to this
127.0.0.1    localhost
127.0.1.1    JitsiMeet

# The following lines are desirable for IPv6 capable hosts
::1          localhost ip6-localhost ip6-loopback
ff02::1      ip6-allnodes
ff02::2      ip6-allrouters
Add the following line to the host file.
xxx.xxx.xxx.xxx jitsi.example.comReplace xxx.xxx.xxx.xxx with the public IP of the server and jitsi.example.com with the fully qualified domain name (FQDN).
Update server
Connect to the server using SSH and run the following commands. If you are using Windows, you could use SmarTTY or PuTTY to connect to the server.
On Linux or Mac, use ssh your_username@host_ip_address .
After connecting to the server, run
sudo apt-get update
sudo apt-get upgrade
Then run:
apt install apt-transport-https
sudo apt-add-repository universe
sudo apt update
Add Jitsi Repository
Run the following commands to add Jitsi repository.
curl https://download.jitsi.org/jitsi-key.gpg.key | sudo sh -c 'gpg --dearmor > /usr/share/keyrings/jitsi-keyring.gpg'
echo 'deb [signed-by=/usr/share/keyrings/jitsi-keyring.gpg] https://download.jitsi.org stable/' | sudo tee /etc/apt/sources.list.d/jitsi-stable.list > /dev/null

sudo apt update
Configure Firewall
Next, we have to update the firewall to allow connections to the ports that are required for the proper working of the service.
sudo ufw allow 80/tcp
sudo ufw allow 443/tcp
sudo ufw allow 10000/udp
sudo ufw allow 22/tcp
sudo ufw allow 3478/udp
sudo ufw allow 5349/tcp
sudo ufw enable
Install Jitsi Meet
We have set up all the requirements to install Jitsi Meet on our server. Install Jitsi Meet by running the command:
sudo apt install jitsi-meet -yAfter starting the installation, you will get a prompt similar to this.
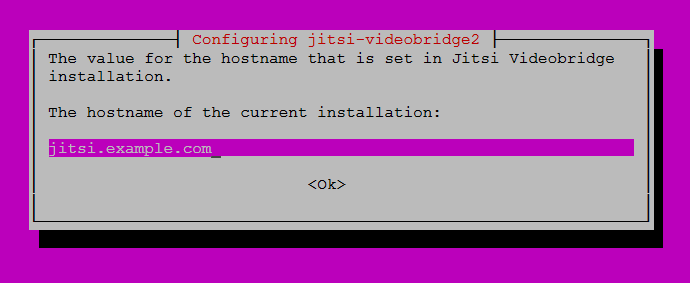
A shown in the picture, type the FQDN and select OK (press Tab to select different options). Replace jitsi.example.com with jitsi.<your_domain>.com.
In the next step, we have the option to choose an SSL certificate. We can either use a self-signed certificate (never use in production) or a custom certificate.
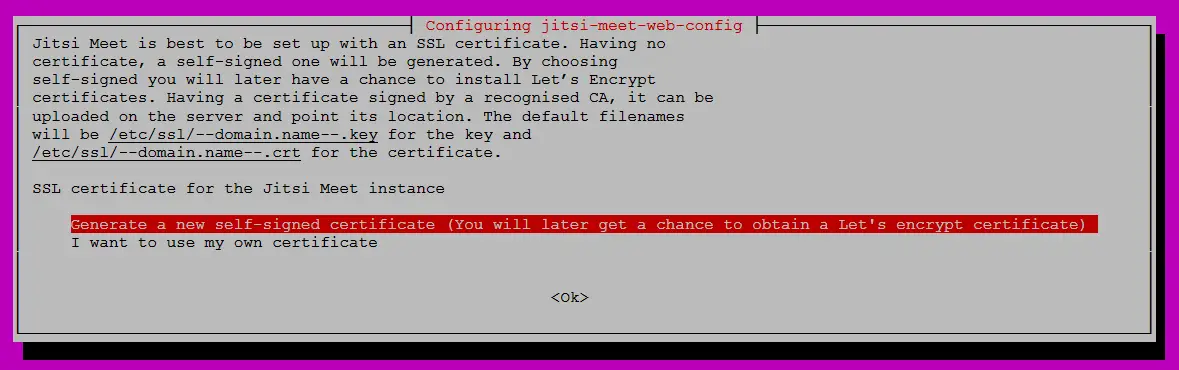
Select the first option as shown in the image to generate a self-signed certificate. Then press OK (Tab).
As I said earlier, it is better to secure the domain with an SSL certificate. You can generate a Let's Encrypt SSL certificate by running the following.
sudo /usr/share/jitsi-meet/scripts/install-letsencrypt-cert.shRunning the script will ask you to enter your email address. Type the email id and hit enter to complete the setup.
Create a meeting
Open any browser and navigate to https://meet.<your_domain>.com. You should see the home page of Jitsi Meet. Create a new meeting and share the meeting link with your friends.
Blocking Public Access
Now, the problem is that anyone who knows your domain name can create and host a meeting on your server.
Only authenticated users should be allowed to create meetings. Others should only be able to join the meeting if they are invited.
To enable user authentication, do the following.
Open /etc/prosody/conf.avail/[your-hostname].cfg.lua and change the authentication type from anonymous to internal_hashed.
You can open the file with sudo nano /etc/prosody/conf.avail/[your-hostname].cfg.lua.
VirtualHost "jitsi.<your_domain>.com"
    -- enabled = false -- Remove this line to enable this host
    authentication = "internal_hashed"
Note that I have changed the authentication type to internal_hashed.
Create a Virtual Host for guest users
Add the following lines to the that we have opened just before to enable access for guest users.
VirtualHost "guest.<your_domain>.com"
    authentication = "anonymous"
    c2s_require_encryption = false
Replace <your_domain> with the domain name.
Configure Jitsi Meet to allow guest users
Open /etc/jitsi/meet/[your-hostname]-config.js. Uncomment and change the domain and anonymousdomain option as shown below.
var config = {
    // Connection
    //

    hosts: {
        // XMPP domain.
        domain: 'jitsi.<your_domain>.com',
        anonymousdomain: 'guest.jitsi.<your_domain>.com',

        // XMPP MUC domain. FIXME: use XEP-0030 to discover it.
        muc: 'conference.<!--# echo var="subdomain" default="" -->jitsi.<your_domain>.com'
    },
    ....
    Some content has been removed
}
Next, open /etc/jitsi/jicofo/sip-communicator.properties and add the following line to it.
org.jitsi.jicofo.auth.URL=XMPP:jitsi.<your_domain>.comCreate a prosody user
The last step is to add a prosody user. Run this command to add a new user. The users that you add using this command will be able to create new meetings.
sudo prosodyctl register username jitsi.<your_domain>.com passwordReplace username, your_domain, and password with appropriate values.
Restart the services with the following command.
systemctl restart prosody
systemctl restart jicofo
systemctl restart jitsi-videobridge2
Create new meeting
Open any browser and navigate to jitsi.<your_domain>.com and create a new meeting.
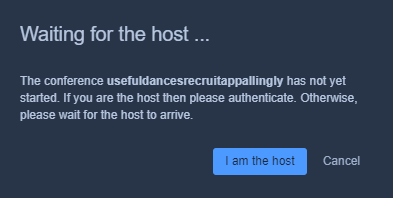
You will see a popup like this. Click the I am the host button and enter the username and password of the prosody user account (created just before) to authenticate.
You will not be able to create a new meeting without providing a valid username and password. But, anyone can join a meeting without authenticating.
Conclusion
In this post, we learned how to self-host Jitsi Meet on a server. This was a basic server setup. You can also customize the UI of Jitsi Meet according to your needs. For example, we can change the Logo, color, and even write custom code to perform several activities on the client-side.
If self-hosting Jitsi Meet is not affordable or is too difficult for you, use https://meet.jit.si. It is a free service that offers Jitsi Meet for free.


