In this post, I’ll show you how to use custom fonts in Flutter applications.
To use custom fonts in your Flutter application, you must include them in your pubspec.yaml file under the fonts heading.
I think it is a good time to save a copy of your application so that you can restore it if something goes wrong while editing the code.
How to use custom fonts in Flutter?
To use custom fonts in the application, we must:
- Download the fonts and import them to our project.
- Specify it in the pubspec.yaml file.
- Use them in our application.
In this tutorial, I’ll be using two fonts.
First, let’s download the fonts for our application. You can download the fonts from this site.
Importing custom fonts
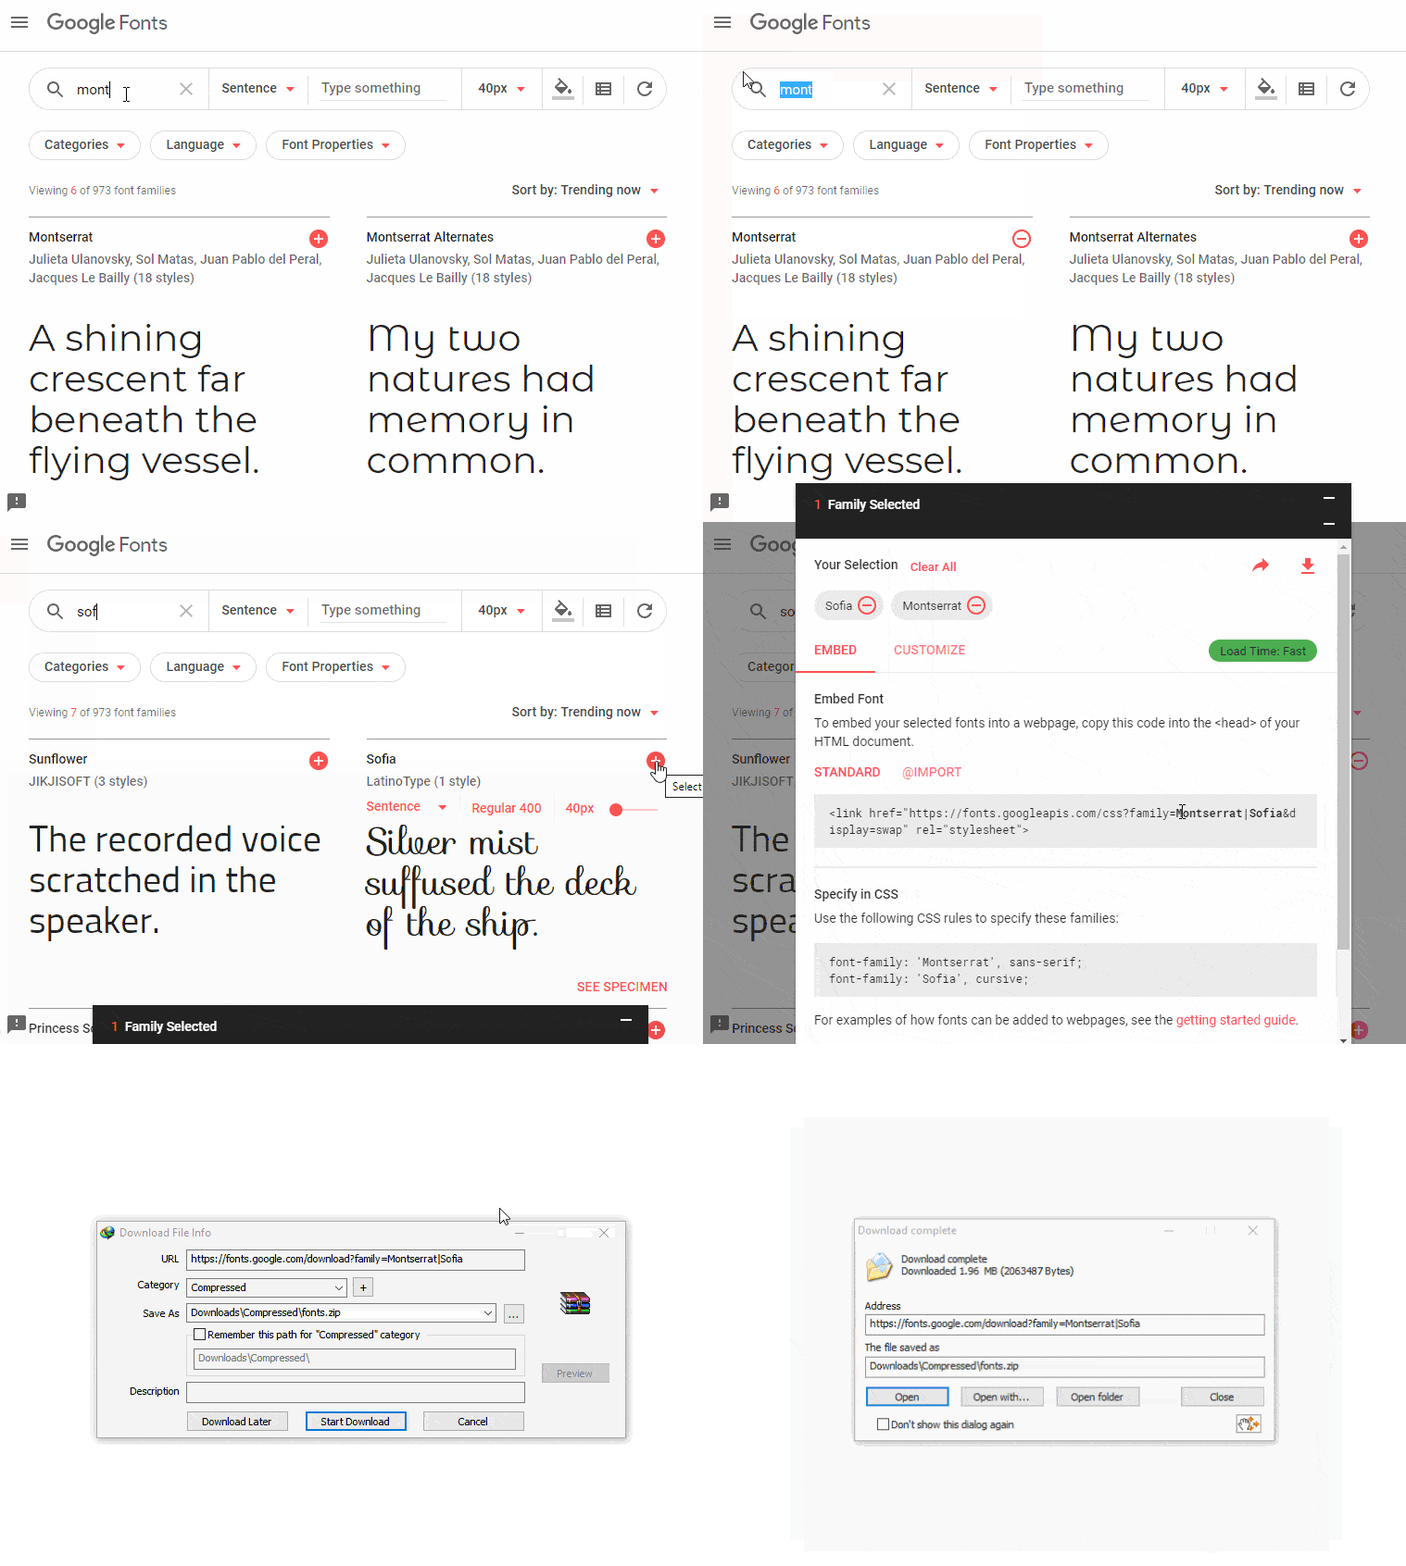
To download a font visit this site and select a font:
- Click on the ➕ icon near to the font.
- From the box that appears at the bottom of the screen, click on ➖ icon.
- Click the download icon ⬇ to download the font.
- Extract the downloaded file.

Next, we should import the font files to our application. For that, open the folder where the files are extracted.
Come back Android studio and Right-click on the project folder (my_fluttter_app) -> New -> Directory and name it as fonts to create a new directory.
Now copy the font files from the extracted folder. Right-click on fonts folder in Android Studio -> Paste to import the font to our project.
Adding fonts to pubspec.yaml
After importing the fonts, it should be added to pubspec.yaml. Open pubspec.yaml and scroll down to the bottom of the file. You will see these lines there.
  # fonts:
  #   - family: Schyler
  #     fonts:
  #       - asset: fonts/Schyler-Regular.ttf
  #       - asset: fonts/Schyler-Italic.ttf
  #         style: italic
  #   - family: Trajan Pro
  #     fonts:
  #       - asset: fonts/TrajanPro.ttf
  #       - asset: fonts/TrajanPro_Bold.ttf
  #         weight: 700
This is the section where you can add all the custom fonts you are using in the application. To add the fonts, uncomment these lines by selecting them and pressing Ctrl + / . Now remove the additional space from each lines.
  # example:
  fonts:
    - family: Schyler
      fonts:
        - asset: fonts/Schyler-Regular.ttf
        - asset: fonts/Schyler-Italic.ttf
          style: italic
    - family: Trajan Pro
      fonts:
        - asset: fonts/TrajanPro.ttf
        - asset: fonts/TrajanPro_Bold.ttf
          weight: 700
  #
Replace the default font with the custom font.
  # example:
  fonts:
    - family: Montserrat
      fonts:
        - asset: fonts/Montserrat-Regular.ttf
        - asset: fonts/Montserrat-Italic.ttf
          style: italic
    - family: Sofia
      fonts:
        - asset: fonts/Sofia-Regular.ttf
  #
Click on Package Get.
Make sure the code has a proper indentation of two spaces. Otherwise the code won’t work.
Here’s my pubspec.yaml file.
name: my_flutter_app
description: A new Flutter application.

# The following defines the version and build number for your application.
# A version number is three numbers separated by dots, like 1.2.43
# followed by an optional build number separated by a +.
# Both the version and the builder number may be overridden in flutter
# build by specifying --build-name and --build-number, respectively.
# In Android, build-name is used as versionName while build-number used as versionCode.
# Read more about Android versioning at https://developer.android.com/studio/publish/versioning
# In iOS, build-name is used as CFBundleShortVersionString while build-number used as CFBundleVersion.
# Read more about iOS versioning at
# https://developer.apple.com/library/archive/documentation/General/Reference/InfoPlistKeyReference/Articles/CoreFoundationKeys.html
version: 1.0.0+1

environment:
  sdk: ">=2.1.0 <3.0.0"

dependencies:
  flutter:
    sdk: flutter

  # The following adds the Cupertino Icons font to your application.
  # Use with the CupertinoIcons class for iOS style icons.
  cupertino_icons: ^0.1.2

dev_dependencies:
  flutter_test:
    sdk: flutter


# For information on the generic Dart part of this file, see the
# following page: https://www.dartlang.org/tools/pub/pubspec

# The following section is specific to Flutter.
flutter:

  # The following line ensures that the Material Icons font is
  # included with your application, so that you can use the icons in
  # the material Icons class.
  uses-material-design: true

  # To add assets to your application, add an assets section, like this:
  # assets:
  #  - images/a_dot_burr.jpeg
  #  - images/a_dot_ham.jpeg

  # An image asset can refer to one or more resolution-specific "variants", see
  # https://flutter.io/assets-and-images/#resolution-aware.

  # For details regarding adding assets from package dependencies, see
  # https://flutter.io/assets-and-images/#from-packages

  # To add custom fonts to your application, add a fonts section here,
  # in this "flutter" section. Each entry in this list should have a
  # "family" key with the font family name, and a "fonts" key with a
  # list giving the asset and other descriptors for the font. For
  # example:
  fonts:
    - family: Montserrat
      fonts:
        - asset: fonts/Montserrat-Regular.ttf
        - asset: fonts/Montserrat-Italic.ttf
          style: italic
    - family: Sofia
      fonts:
        - asset: fonts/Sofia-Regular.ttf
  #
  # For details regarding fonts from package dependencies,
  # see https://flutter.io/custom-fonts/#from-packages
Using custom fonts
Now we can use the custom fonts in our application. To keep it simple, let’s apply the custom font to our Text widget which we have created in the previous tutorials. Modify main.dart as shown below.
import 'package:flutter/material.dart';

void main()
{
  runApp(
    MaterialApp(
      title: "My App",
      home: Container(
        color: Colors.amber,
        alignment: Alignment.center,
        child: Text(
          "Using Custom Fonts",
          textDirection: TextDirection.ltr,
          style: TextStyle(
            decoration: TextDecoration.none,
            fontFamily: "Sofia",
            fontWeight: FontWeight.bold,
            color: Colors.white,
          ),
        ),
      ),
    )
  );
}
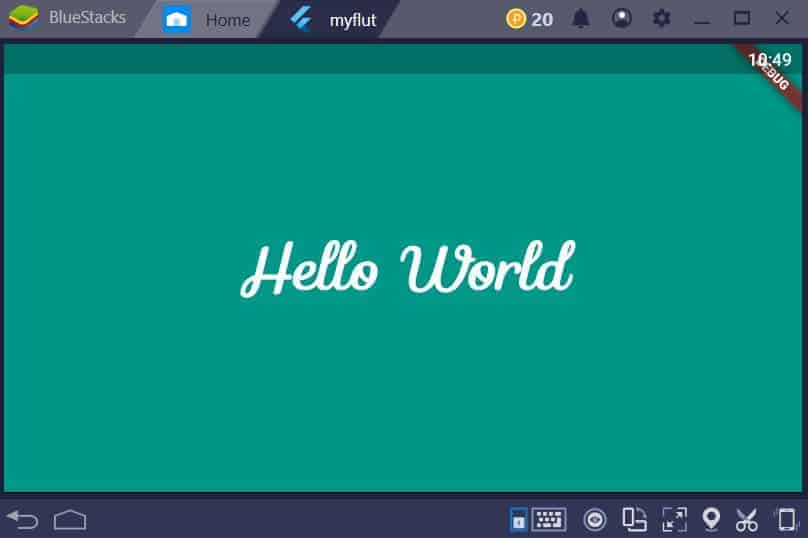
Run the project to see the output.

Happy coding. 👍


