

In the previous post, we learned about the Razor syntax. It allows us to embed C# code in HTML markup. In this post, we’ll learn about Blazor components.
If you have any difficulties in following this tutorial, download the source code of this project from GitHub.
 geekinsta
To track changes, see this commit.
What is a component?
We can define a component as a small block or part of a page that has its own template, style, and properties. A Blazor app should have at least one component. A component can be a small button, a navigation bar, or a forum.
Take this website as an example. The homepage of this site has a navigation bar, sidebar, and an area to display the most recent posts. We can call these three sections as three different components.
In the previous post, we had a small discussion about components. We learned about Razor syntax by making changes to Index component.
Routable and reusable components
Components in a Blazor application can be classified into two. Routable and shared (or reusable) components.
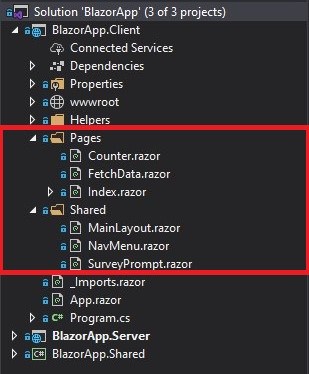
Components are usually kept in the Pages and Shared folder of the Client project.
Now you must be wondering about the difference between components in these folders.
Routable components
The components kept in the Pages folder are Routable components. Which means that, you can associate these components with some specific routes or URLs.
If you take a look at the code of components in Pages folder, you will see that the first line starts with an @page directive.
In the Index component, the page directive is set to /. This means that the component is the root component. Similarly, in the Counter component, the page directive is set to “/counter”. So, the counter component is accessible at https://localhost:port/counter.
Shared components
Shared components are not routable. Instead, as the name indicates, they can be reused and displayed in any routable components.
Create a new component
We are now going to use this shared component to display the list of customers as we did in our previous tutorial. But, this time, instead of writing all the logic and template markup to display the list of customers in Index component, we’ll create a new shared component and use it as a template.
To create a component, Right-click on the Shared folder -> New Item – > Razor Component and name it CustomerList.razor.
<h3>CustomerList</h3>

@code {

}
As you can see, this is an empty component. So, copy the markup related to displaying customer list form Index component to CustomerList component.
Here’s the code of CustomerList component.
<h3>Customer List</h3>
@foreach (var customer in Customers)
{
    <div class="card mb-3">
        <div class="card-header">
            @customer.Name
            @if (customer.IsSubscribedToNewsletter)
            {
                <span class="badge badge-success">Subscribed</span>
            }
            else
            {
                <span class="badge badge-danger">Not subscribed</span>
            }
        </div>
        <div class="card-body">@customer.Email</div>
    </div>
}

@code {
    public class Customer
    {
        public string Name { get; set; }
        public string Email { get; set; }
        public bool IsSubscribedToNewsletter { get; set; }
    }

    List<Customer> Customers = new List<Customer>()
    {
        new Customer(){Name= "John Doe", Email="john@mail.com", IsSubscribedToNewsletter=true},
        new Customer(){Name= "Jane Doe", Email="jane@mail.com", IsSubscribedToNewsletter=true},
        new Customer(){Name= "Janet Doe", Email="janet@mail.com", IsSubscribedToNewsletter=false},
    };
}
Remove all unused code from the Index component. Index.razor should only contain the page directive and code block.
@page "/"

@code{

}
Next, we need to display our CustomerList component in Index component. To display shared component, we can use a custom HTML tag with the same name of our component. So, if we want to display the CustomerList component in Index component, use <CustomerList /> tag.
Here is the code of Index component.
@page "/"

<CustomerList />

@code{

}
Press Ctrl + F5 to run the application, We’ll see the list of customers displayed on the homepage.
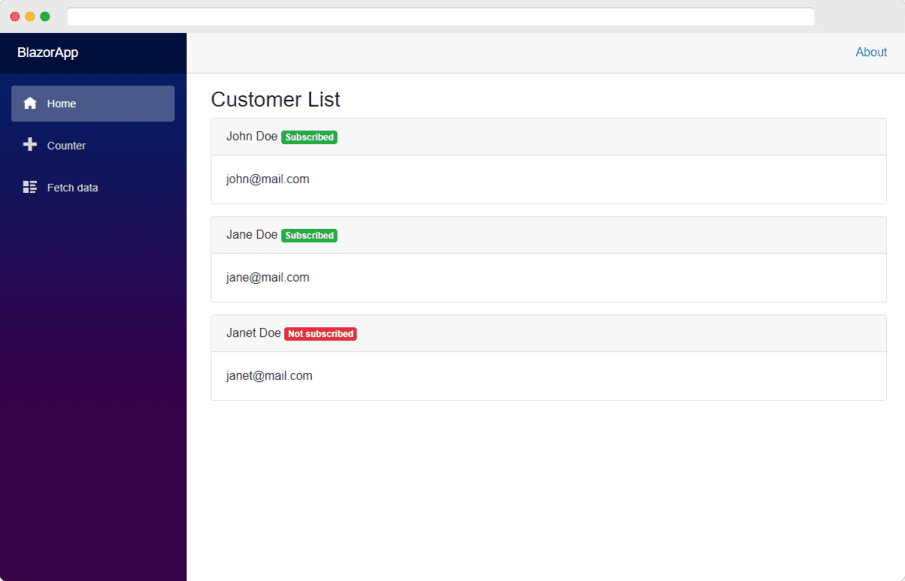
Our application is now working as expected. We have learned how to create and display components in a Blazor application.
But, there is a problem with the approach that we used in this tutorial. The CustomerList component is not designed to accept data from other components. For example, we cannot pass a list of customers from the Index component to CustomerList component. This affects the reusability of our components.
How can we solve this problem? How can we pass a list of customers from one component to another? I’ll explain it in the next tutorial.
If you are facing any errors or issues, put them in the comments below.


